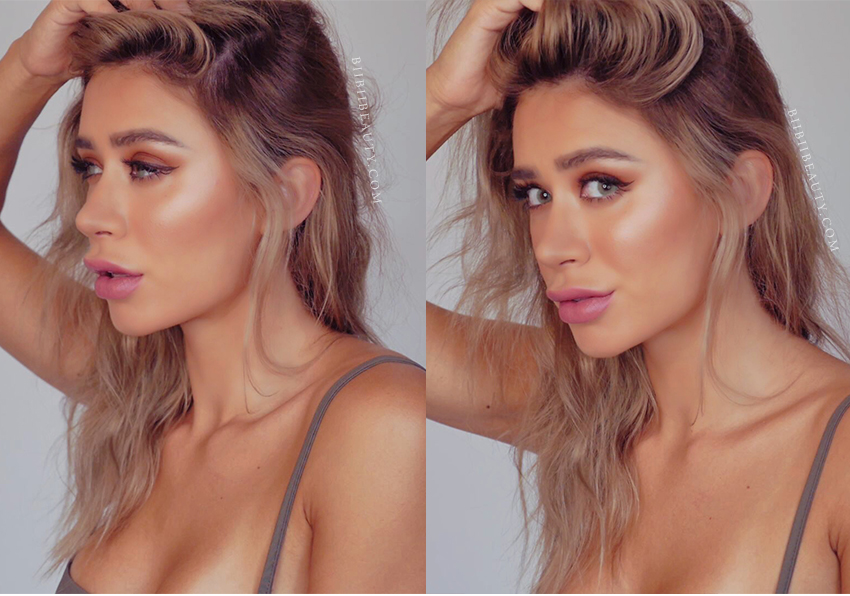

I am always all about wearable makeup, looks that are easy to create fast while still looking fresh and beautiful. Today I will be sharing my new romantic makeup tutorial which features a soft wearable smokey eye with hints of bronze and neutral rose shades. Making it the ideal look for summer evenings out, dates and everyday glam!
New Romantic Makeup Tutorial Video
*watch the new romantic makeup tutorial video, or check out the photo tutorial below*
Photo Makeup Tutorial
Products Used
- Solotica Hydrocore Rio Lenses in Copacabana
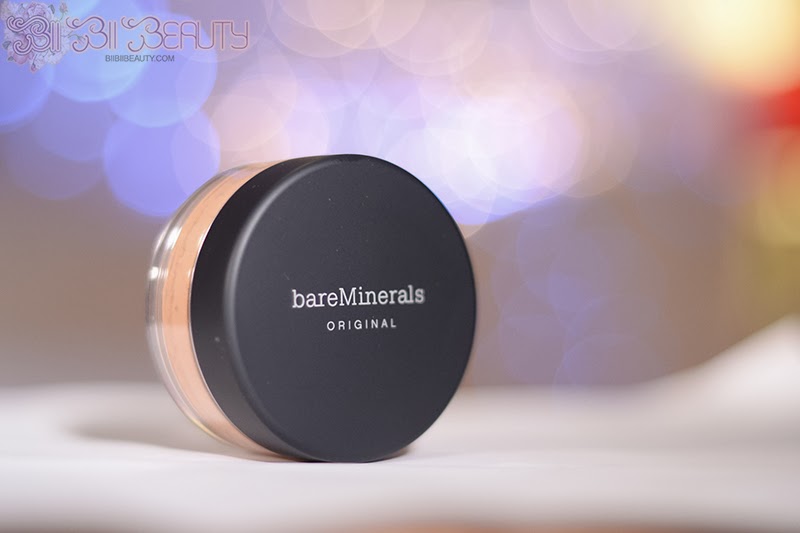
- NARS All Day Luminating Weightless Foundation in medium 1.5 Vallauris
- Nude By Nature Perfecting Concealer 07 Latte
- Elf Brow Pencil Taupe
- Majolica Majorca Skin Trick Powder
- Sleek Makeup Face Contour Kit Medium 885
- Sleek Makeup Blush By 3 Palette Pink Lemonade 369
- Etude House V Line Slim Maker 1 sun gold *discontinued…*
- Anastasia Beverly Hill Soft Glam Palette Sultry, Sienna, Rustic
- DUP Silky Liquid Eyeliner Brown Black
- April Skin No Smudge Eye Doll Brush Pen Liner Brown *discontinued…*
- Eyemania Mineral Mascara Separate Long
- MAC Lipstick Twig
Step 1 – Foundation
Using a light to medium coverage foundation, apply a light layer over the skin to achieve a natural look.

Step 2 – Concealer
Apply a hydrating concealer that is 1 shade lighter than your skin tone to the undereye area. Using a fluffy concealer brush, blend the product along the under eyes, the upper and inner cheeks, and along the inner corner of the eye and side of your nose.

Step 3 – Setting
Set your foundation with a translucent setting powder. Preferably, only set the t-zone area to help maintain skin hydration and achieve a natural “glow”.

Step 4 – Contour
Contour the face with a contouring shade that best suits your skin tone. I recently like to contour in a way that amplifies the apples of my cheeks and sharpens the jawline. To do so, apply contour under the cheekbones applying from the inner ear to around 2/3’s of the way to the inner corner of the mouth. Apply gently to achieve a naturally contoured look. The make the apples of the cheeks look larger and fuller, make a smiling face, then take a very small amount of contouring powder and gently apply it on the underside of the apples of your cheeks while blending it out.
For myself, I have a specific way I like to contour my nose. This method focusing on defining the tip and mid-section while avoiding the upper bridge. If you have a nose shape similar to mine, then this method is one to try out. But if you don’t, then my method might not suit your nose shape. It’s always best to experiment with nose contouring techniques as everyone’s nose is different and what suits others, might not suit you. For myself. I like to create a “lifted” or “button” effect. Apply contour to both sides of my nose bridge focusing on the tip and mid-bridge, adding more colour to the tip and gradually fading it upwards. Then taking more colour, apply an ample amount to the underside of the tip, then take whatever is left over and apply it in a line across the nose just above the tip to create a “dip” effect. What every remains on the brush, apply it to the natural dips of the nostrils to define the natural lines. Blend it all out with the leftover setting powder on your face brush.

Step 5 – Blush & Bronze
Taking a medium coral toned blush, apply it slightly above your contour areas in a blending motion. Starting from the upper cheekbone and blending down towards the apples of your cheek, ensuring the depth of colour is deeper on the cheekbone and lighter on the apples of the cheeks. After blush, I like to make the look a little more “bronze” by going over the blush with a light bronzing shade. I apply both the blush and the bronze to the mid-bridge of my nose and a small wash of the two colours over the top of my forehead and the chin. This light wash of colour in those 3 areas create a natural sun-kissed effect.

Step 6 – Highlight
Taking a highlighting powder and a small powder brush, apply it to the upper cheekbones and pull it down towards the mid-cheekbones. Do NOT bring the highlighter towards the inner cheeks as this will create a “grease” look and will draw attention to the pores. Taking a small dense shadow brush, apply the same highlighter to the upper tip of the nose, the bridge in between the eyes and the top of the chin.

Step 7 – Brows
For this new romantic makeup look, I wanted the soft eyebrows that are subtly filled in. I used a taupe brow pencil and filled in my brows by following their natural shape, focusing most of the product on the outer half of the eyebrows, then applying a light amount to the inner half. Then very lightly blend it with a spooly brush without disrupting the shape.

Step 8 – Eyeshadow
I wanted this eyeshadow look to be simple and soft, for that, I used a very light hand to apply and blend the shadows. To start off, take a warm-toned demi-shimmer rose shade and apply it strictly to the eyelids with a dense medium shadow brush. Then, take a matte faded medium rust shadow and apply it strictly to the crease with a medium dense pencil brush, applying it from the outer corner all the way to the inner corner. Lastly, take a matte medium warm brown shade on a fluffy blending brush, using it to blend out the rust colour. Only blend the top portion of the rust colour to ensure you do not create a “muddy” look. Pick up a little more of the brown shade and apply it to the entire lower lash line, creating a smokey under eye effect. Lastly, take the highlighting colour you used for the face, and with the same brush, you used to highlight the nose, apply the highlighter to the inner corners of the eyes and to the brow bones. Go back in with the blending brush and lightly blend the brow bone and the blending shade of the eye together.

Step 9 – Eyeliner
Taking a brown liquid eyeliner, create a gentle cat eye wing, focusing on creating a medium-thick wing that fades to a thin line across the upper lash line. Then, add a dot to the inner tear duct to create a complete eye lengthening effect for this new romantic makeup look.

Step 10 – Mascara and Lashes
Lastly, for the eyes, apply your favourite mascara to the top and bottom lashes. For myself, I had half of my false lash extensions still on my upper lashes, so I skipped mascara there. However, I still applied mascara to my lower lashes. For a more “romantic” effect, apply some medium dramatic false lashes if you want to.

Step 11 – Point Makeup Freckles
Lately, I have loved the look of light foundation where the freckles on the skin naturally shine through. To amplify that look, I have been taking a very light brown liquid eyeliner pen and dotting over my natural large freckles to make the skin look even more natural. This is completely optional.

Step 12 – Lips
To finish off this new romantic makeup look, I used a medium dusty rose mauve lipstick, applying a light layer to my lips and smudging it out to create a natural looking lip colour. If you don’t have a similar shade, a simple medium nude lip colour will also work wonderfully.

That’s it for this new romantic makeup tutorial! It is a very simple eye and lip look to create but if you’re not used to contouring, that part might be a little more on the advanced side, however, I hope my guide and video will be helpful for that part!
Want to see more makeup tutorials?
Make sure yo subscribe to my youtube channel to see all upcoming makeup videos, skincare videos, fashion hauls and much more!
PIN IT


No Comments